 es / us
 en / ca
You are permanently removing this notification from your Owner Site Notification Feed.
Do you wish to proceed?
Changing your vehicle’s engine oil is one of the most important – and achievable – maintenance tasks you can do yourself. With the right tools, quality Mopar® OEM Parts, and a clear step-by-step process, DIY oil changes can save money, extend engine life, and keep your Chrysler, Dodge, Jeep® or Ram Brand vehicle performing at its best.
This comprehensive guide covers:
- What you need to change your oil
- A step-by-step Mopar oil change process
- Common oil change mistakes to avoid
- Pro tips for DIY Oil Changes
Preparation: What You Need to Change Your Oil
Before starting, gather all tools and supplies. Proper preparation improves safety, saves time, reduces mess and helps ensure success.
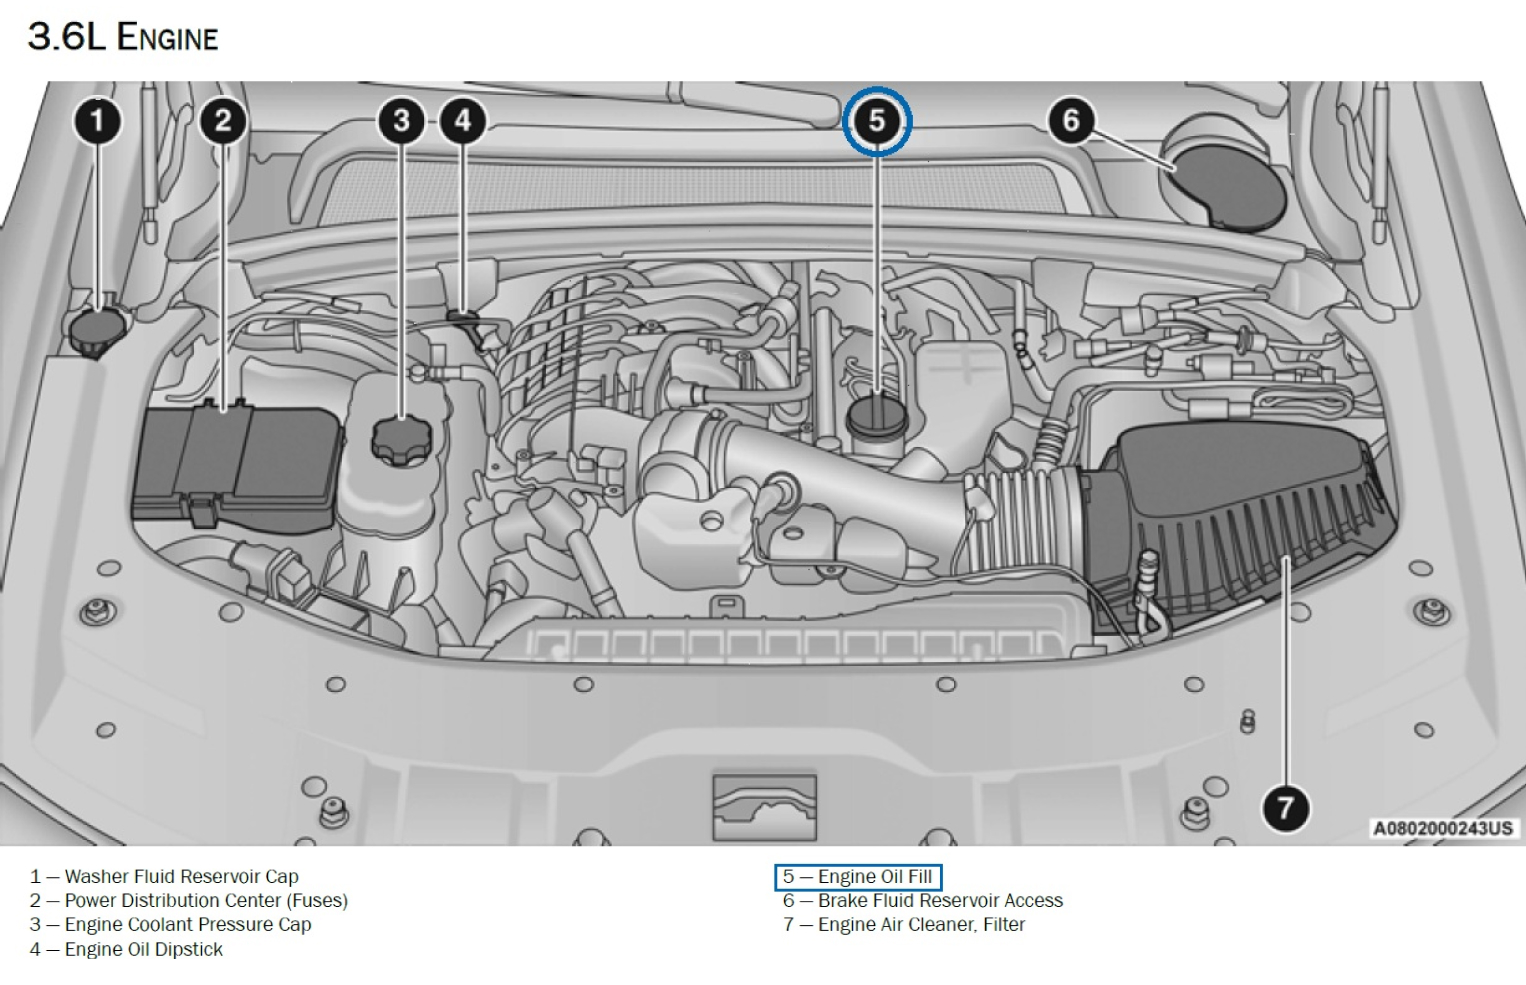
Engine Oil (Correct Type & Viscosity)
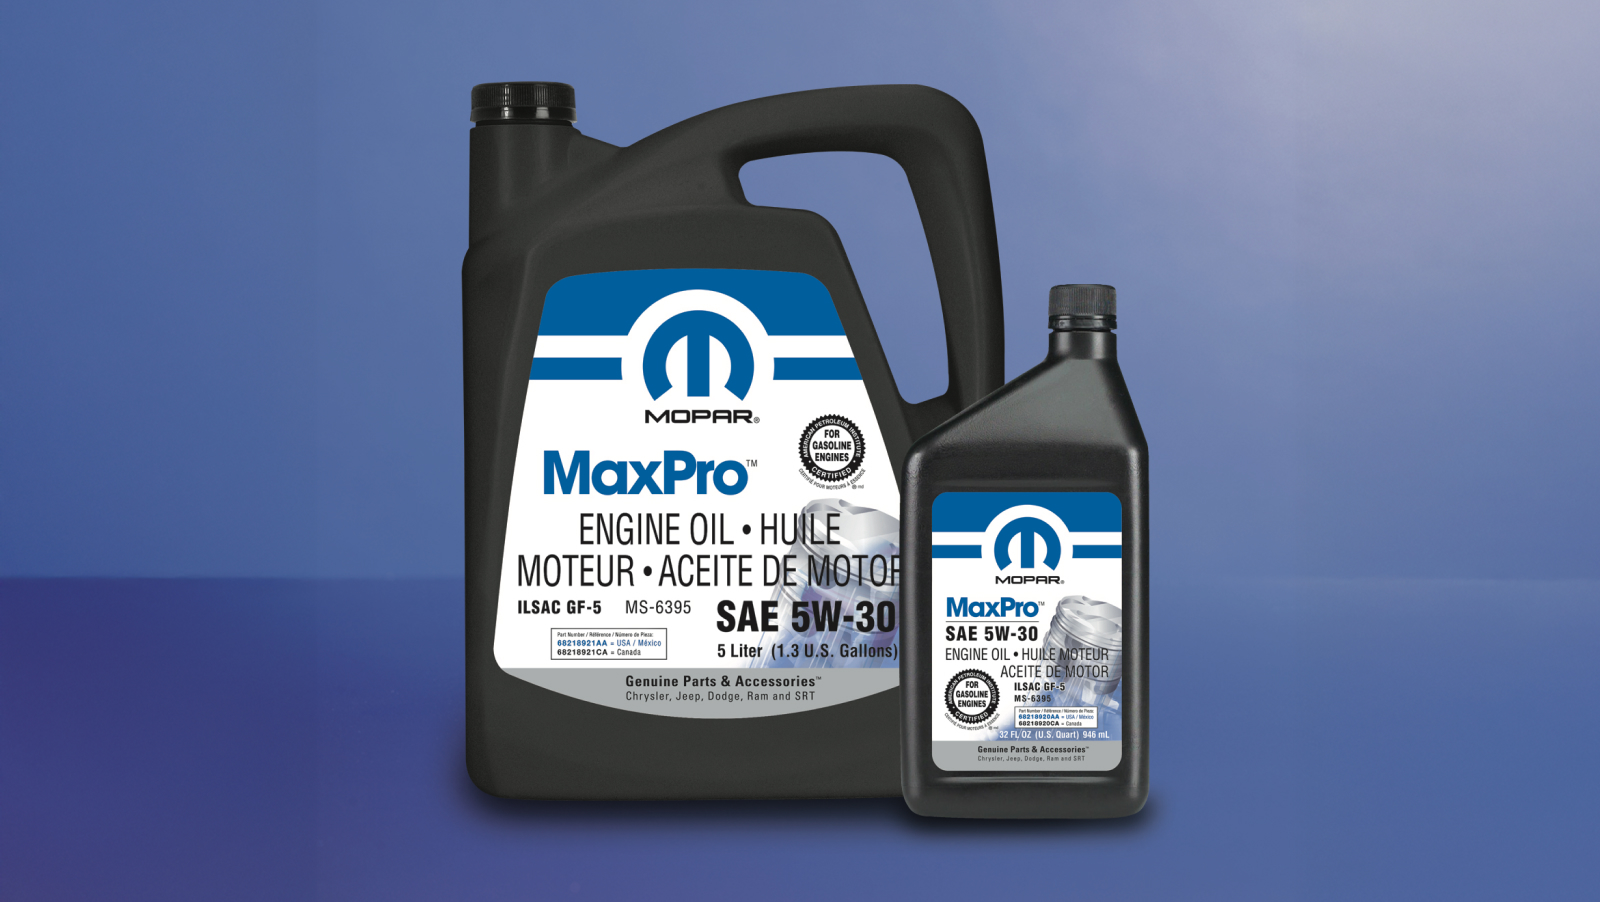
Always use the manufacturer-recommended engine oil viscosity and capacity for your specific vehicle. Using the wrong oil can reduce performance or cause engine damage.
You can find:
- Oil viscosity (example: 5W-30)
- Oil capacity (quarts or liters)
…in the Technical Specifications section of your owner’s manual or via the Mopar owner’s manual online.
For additional guidance, see: HOW OFTEN SHOULD YOU CHANGE YOUR OIL
New Mopar Oil Filter
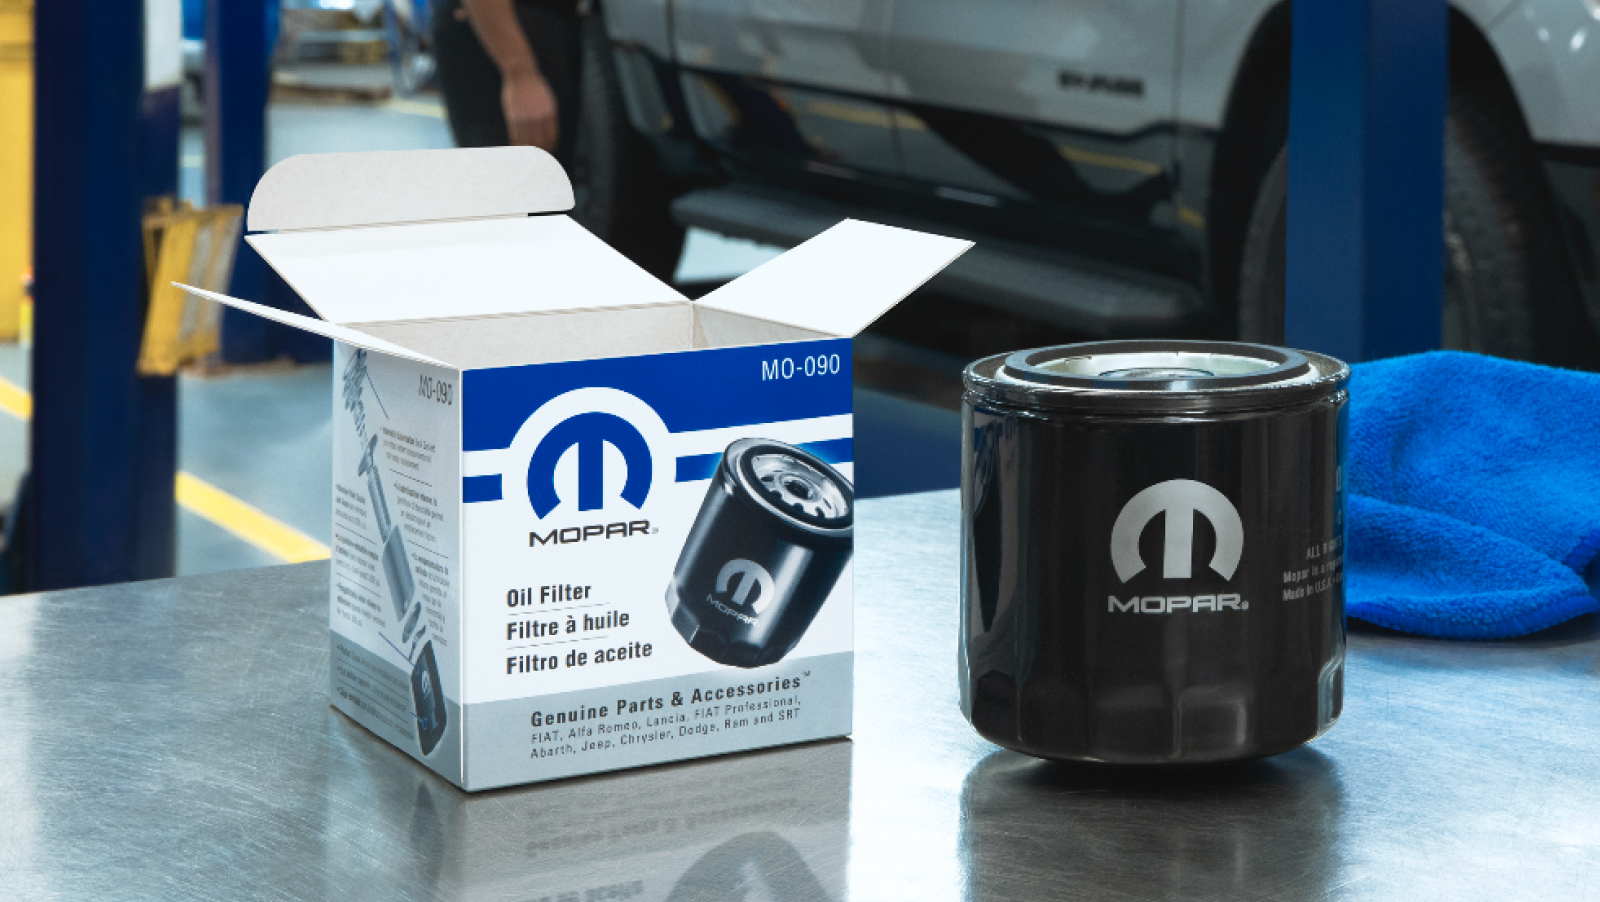
The oil filter must be replaced every time you change your oil. Oil filters trap contaminants and lose effectiveness after one service interval.
Why choose Mopar Oil Filters?
- Designed specifically for Chrysler, Dodge, Jeep and Ram Brand vehicle engines
- Meet or exceed SAE/USCAR-36 performance standards
- Provide proper oil flow and filtration
Find the correct oil filter at store.mopar.com/oil-filters or through your local dealer.
Safety & Support Equipment
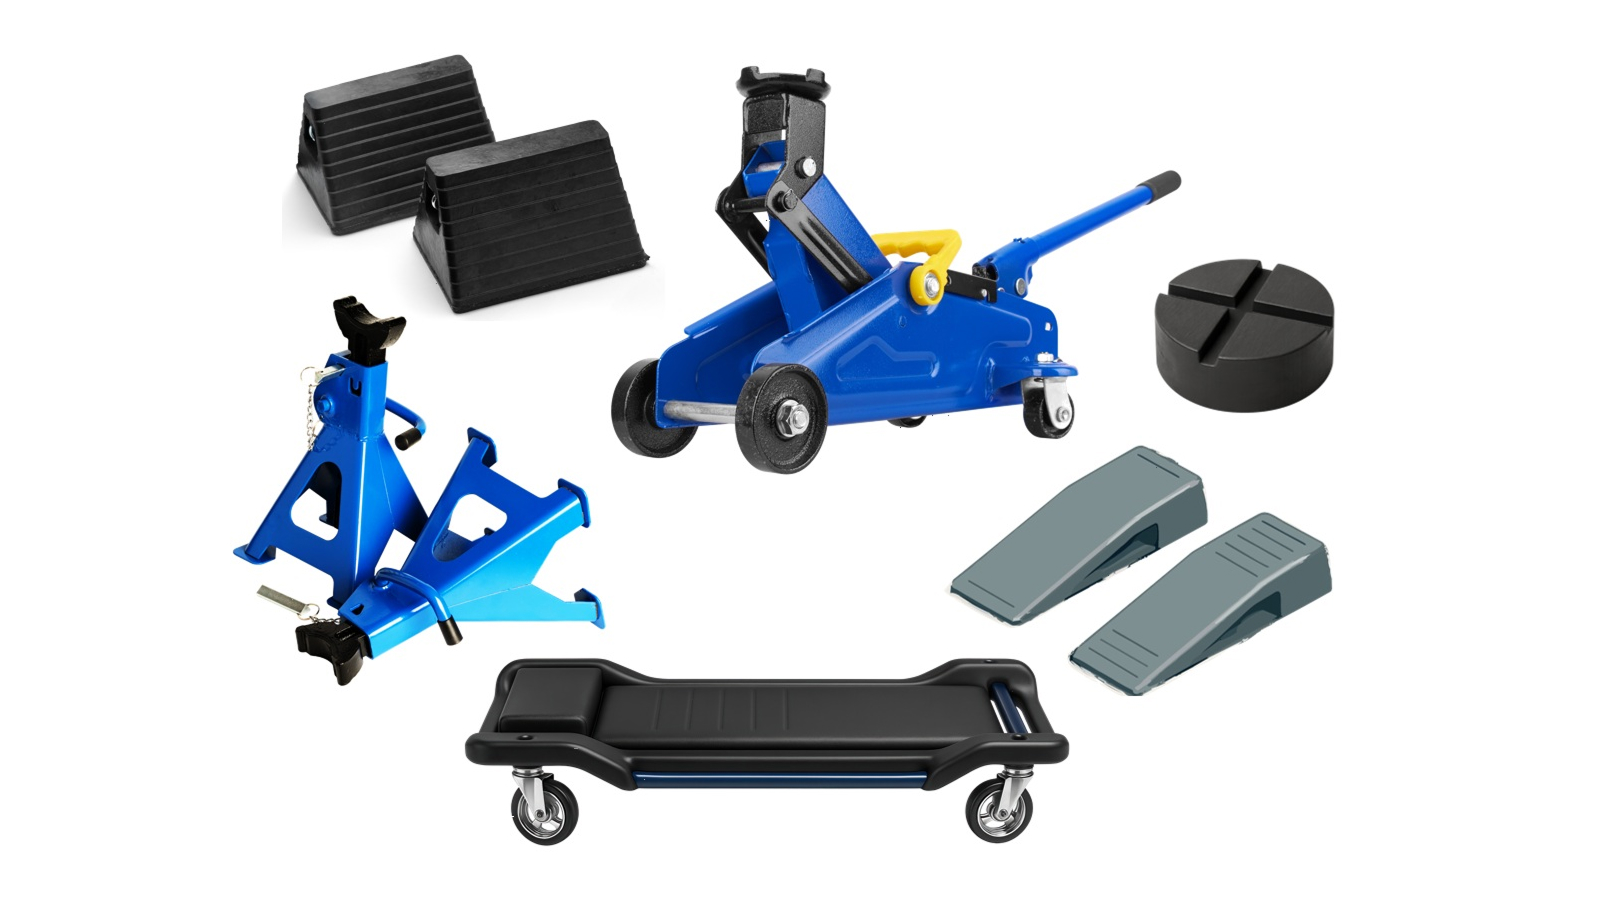
- Wheel chocks – prevent vehicle movement
- Floor jacks (rated above vehicle weight) and pinch weld adapter
- Jack stands or vehicle ramps – to safely support the weight of the vehicle
- Creeper, moving blanket or cardboard for comfort and cleanliness under the vehicle
Never work under a vehicle supported only by a jack.
Tools & Supplies
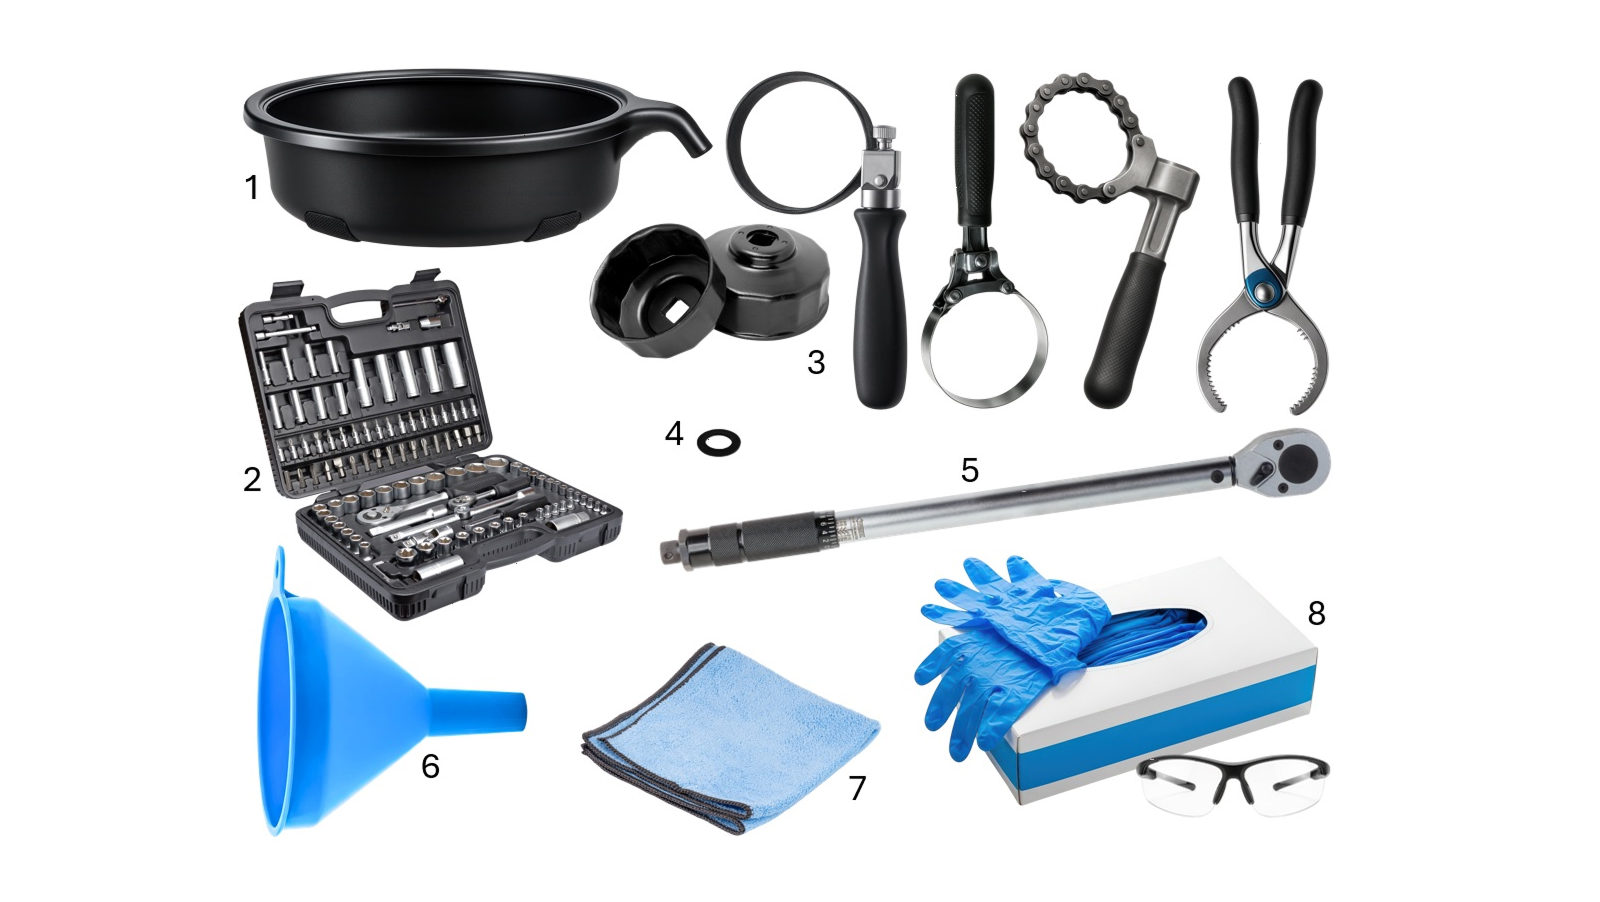
- Oil drain pan (large enough for full oil capacity) and optional drip tray
- Socket set and wrench (correct drain plug size)
- Oil filter wrench (options shown are cap, rubber or metal strap, chain, or pliers-style)
- Drain plug washer (replace if recommended by dealer)
- Torque wrench (to prevent stripped threads and leaks)
- Funnel (to prevent spills)
- Cleaning materials (clean lint-free rags, shop towels, etc.)
- Safety glasses and nitrile gloves
How Long Does an Oil Change Take?
- Experienced DIYers: 15 – 30 minutes
- First-time oil changers: 45 – 75 minutes
Time varies based on vehicle type, preparation and experience.
Step-by-Step Oil Change Instructions
1. Warm Up the Engine
- If the vehicle is cool, start the engine and let it idle for 2 – 5 minutes
- If the vehicle is hot, turn it off and allow to cool for 20 – 30 minutes until warm
Warm oil drains faster – but never work with hot oil.
2. Secure and Lift the Vehicle Safely
- Engage the parking brake
- Place wheel chocks in front of and behind the tires on the opposite end of the vehicle that you’re jacking up
- You should only jack up a vehicle on a solid, flat/level, hard surface like concrete and avoid icy or slippery areas
Use jack points specified in your owner’s manual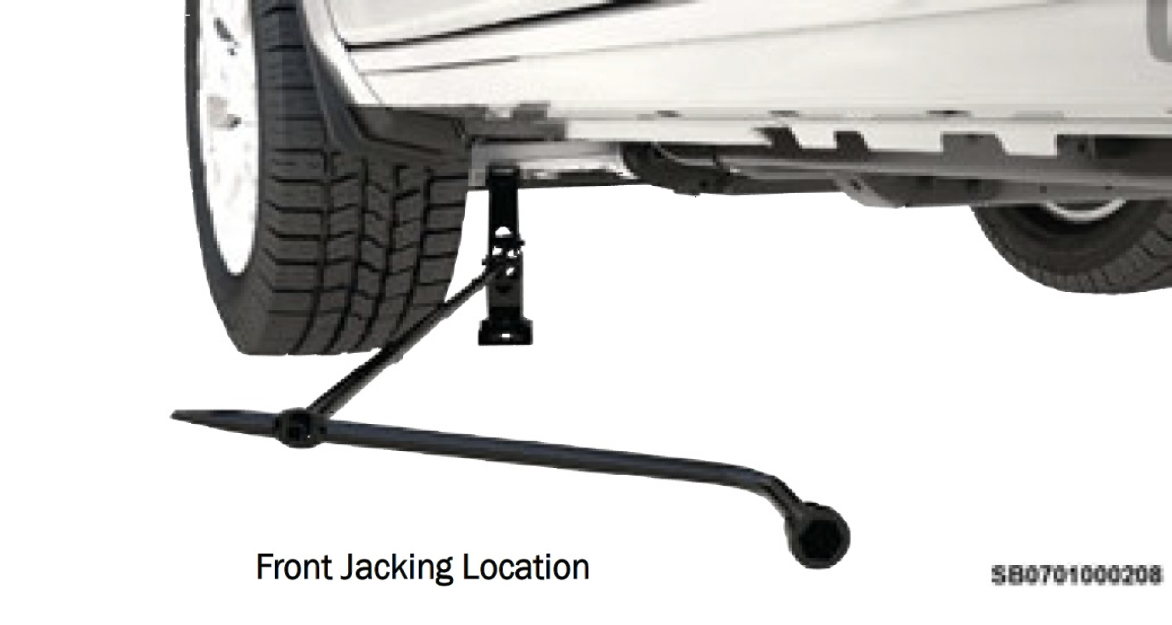
- To find your owner’s manual, check your glovebox. For a digital copy, go to Mopar.com, select your vehicle’s brand, model and year.
- Jacking your vehicle in other areas can result in the vehicle falling and/or creating considerable damage
- Jack up the front of your vehicle first
- If the jack point specified is on a pinch weld, use the pinch weld adaptor with the channel to avoid damage
- Lower the front of the vehicle onto the jack stands
- Do not get under the vehicle when it is only on a jack
- Do not let anyone sit in the vehicle when it is on a jack
- Jack up the back of your vehicle
- Lower the back of the vehicle onto the jack stands
- To aid in draining most of the used oil, the vehicle should be lower in the same direction as the drain plug
- Typically, the drain plug is located at the back of the pan, toward the rear, which would mean that the back should be lower than the front
- The location of the drain plug varies by engine design
- Lower the back of the vehicle onto the jack stands
- If using ramps, align them parallel in front of the front wheels
- Slowly and carefully drive your front wheels/tires up the ramps until they’re fully seated in the well at the top
- It helps to have a spotter outside the vehicle to communicate with the driver
- Do NOT overaccelerate, which can result in driving past the top of the ramp causing considerable damage
- Put your transmission in PARK (or put the vehicle in first gear if your car has a manual transmission), apply the parking brake and turn it off
- Place wheel chocks in front of and behind the rear tires to ensure the vehicle will not move
- Slowly and carefully drive your front wheels/tires up the ramps until they’re fully seated in the well at the top
Ensure the vehicle is stable before proceeding.
3. Drain the Old Engine Oil
- Unscrew the oil fill cap but leave in place (improves drainage)
- Underbody Shield/Skid Plate

- If your vehicle has an underbody shield and/or skid plate they may need to be removed to access the drain plug and oil filter
- It may be helpful to take pictures for reference before removing them so that you know which fasteners go where when you reinstall these later
- Make sure to store these fasteners in a safe place to avoid losing them
- Locate your oil pan and drain plug
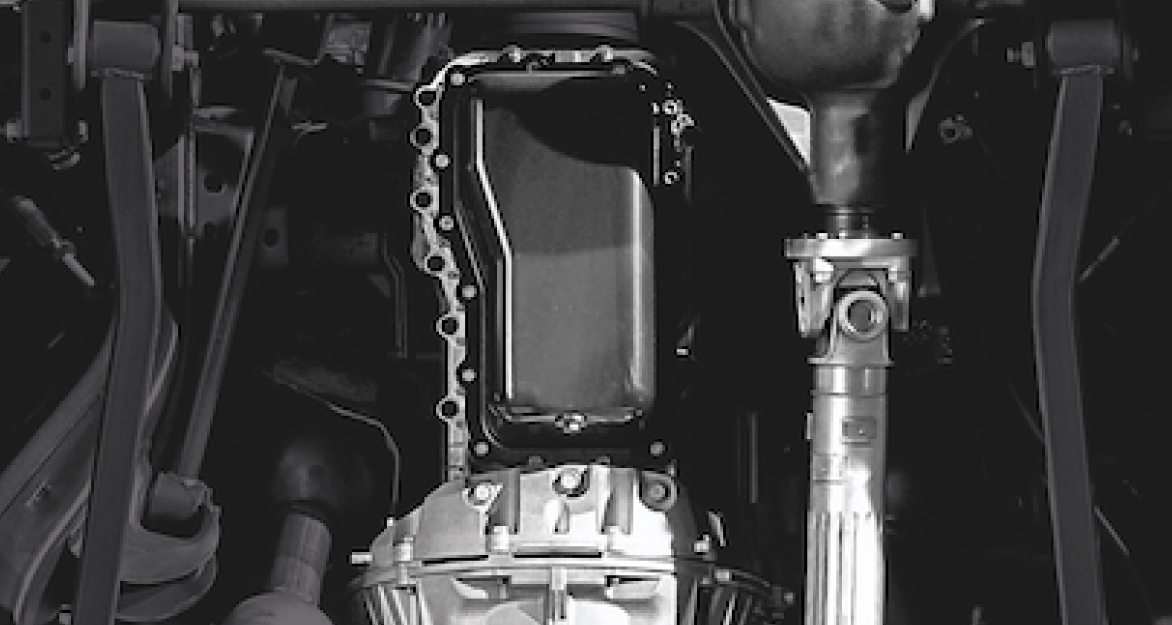
- The oil pan is a metal reservoir attached to the bottom of the engine.
- The drain plug is a single, large hex-head bolt located at the lowest point on this pan
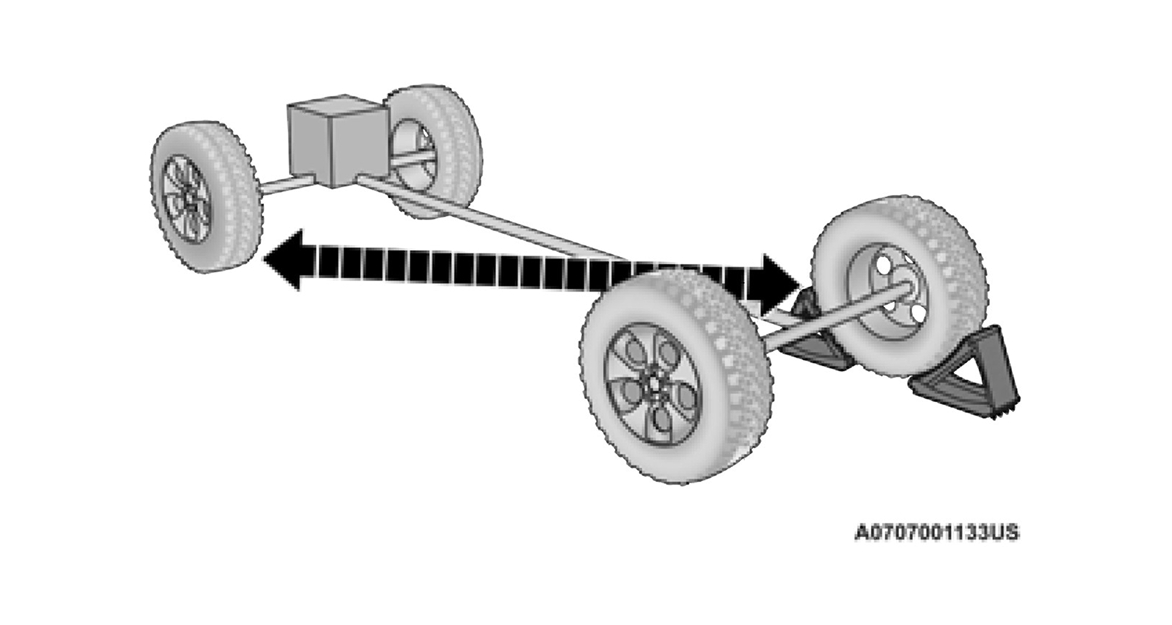
- If you have a traditional longitudinal engine where the crankshaft runs parallel to the direction of travel (as shown above and commonly found in rear or 4WD vehicles), the engine will be centered within the engine compartment, and the drain plug will typically be located near the rear of the oil pan
- If your engine is transverse mounted where the crankshaft runs perpendicular to the direction of travel (commonly found in front wheel drive vehicles), the engine will be located off-center within the engine compartment, and the drain plug will typically be located at the lowest point toward the rear of the pan
- Position the drain pan under the drain plug
- Loosen the drain plug using the correct socket (your appearance and location may vary)

- Using the wrong size can cause the socket to slip on the drain plug bolt causing the corners to be “rounded off” which can make it harder to remove it
- If this happens, you should replace the drain plug
- Remove by hand, holding onto the drain plug, allowing the oil to continue to drain
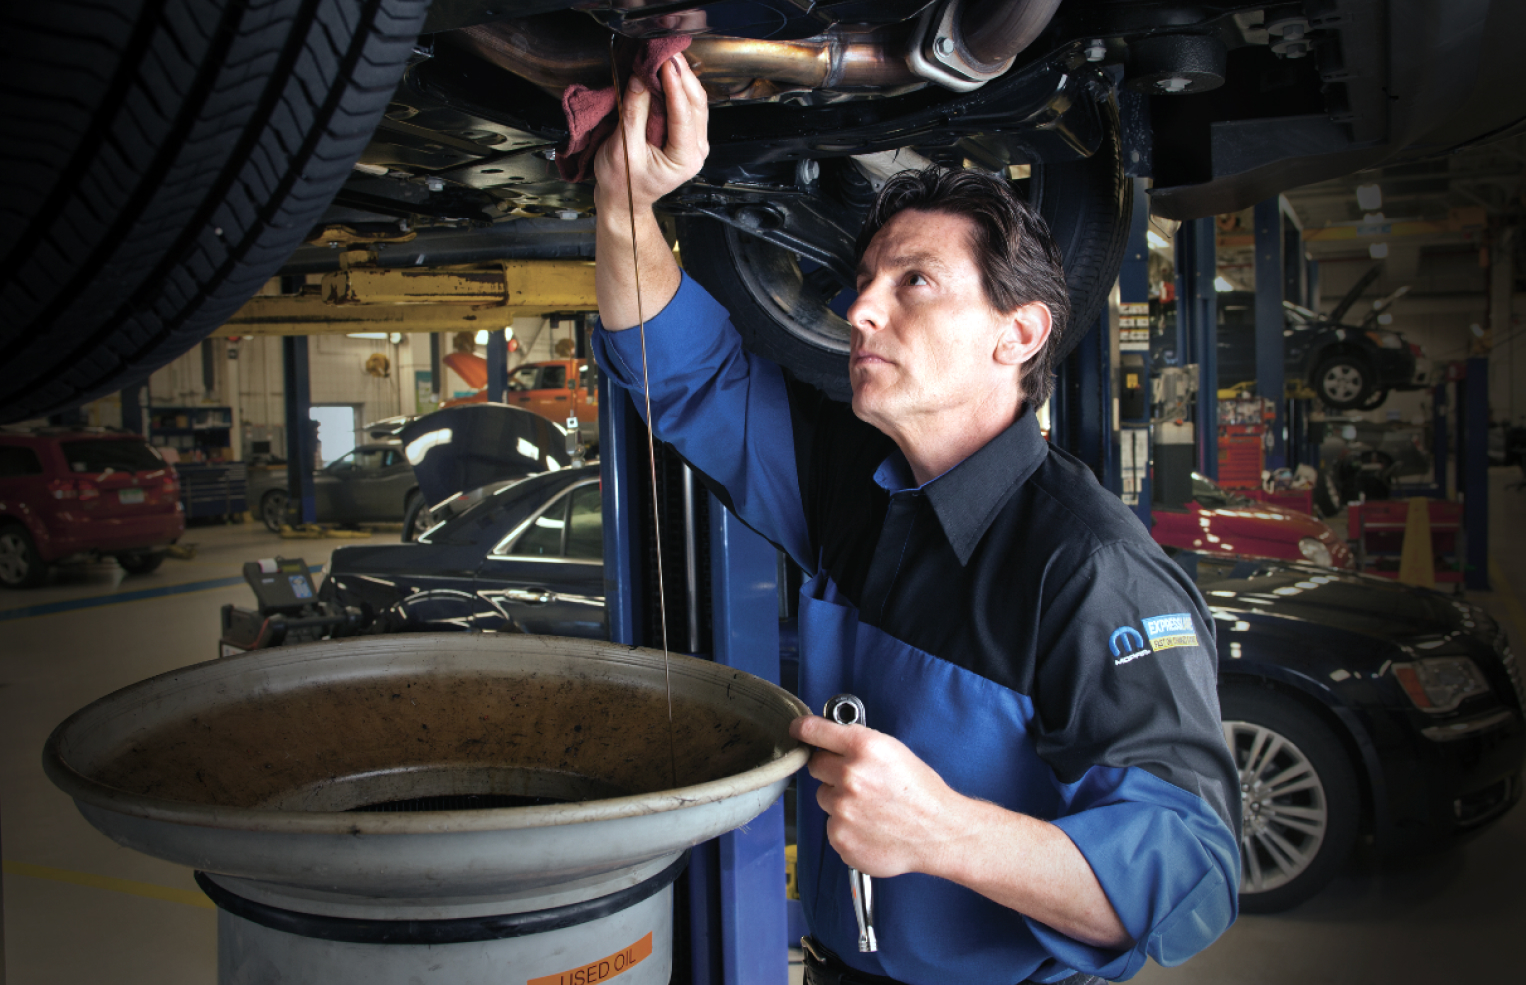
Inspect the drain plug and washer and replace them if damaged.
4. Replace the Oil Filter
- Canister Filters:
- Canister filters are the more traditional design and located near the bottom of the engine near the oil pan
- While still under the vehicle, position the drain pan under the oil filter (most are close enough that you can place the pan under the plug and filter at the same time)
- Loosen the old filter carefully using your oil filter wrench – oil will spill out over the filter
- Remove the rest of the way by hand – turn upside down and set in the drain pan to remove most of the remaining oil
- Verify the old gasket was removed with the old filter (using multiple gaskets can result in leaks and potential damage)
- Remove the new filter from all packaging and lightly oil the new filter gasket and threads
- Carefully thread the new filter by hand to ensure it’s threaded properly
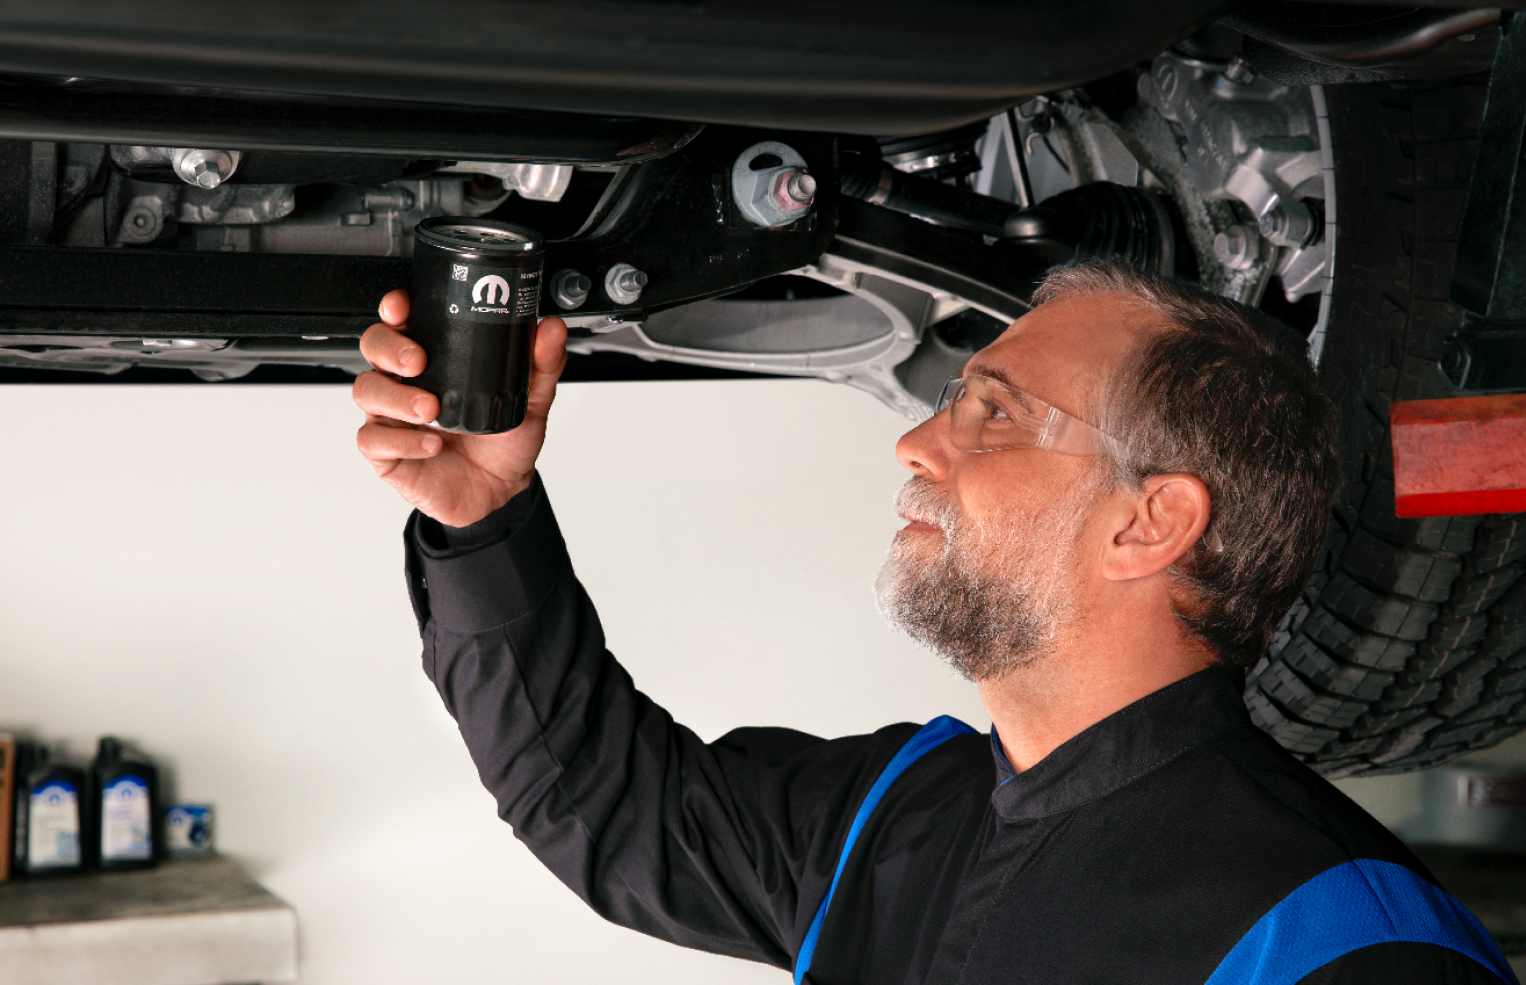
- Tighten until the gasket contacts the base, then turn ¾ of a turn – no tools required.
- Cartridge-Type Filters
- Cartridge-type filters are paper filters without the hard outside canister, inserted into a metal or plastic housing commonly on or near the top of the engine
- Find the right socket size to loosen the housing cover
- Remove the housing cover with a rag or paper towel to catch any dripping oil
- Remove the cartridge filter from the cover or housing and place it in the drain pan to allow most of the oil to drain out
- Replace the O-ring on the seal of the cartridge cover
- A new O-ring should be included in the box with the new cartridge-type filter
- Always replace the O-ring with every oil change
- Lubricate the new O-ring with a little clean oil and install it making sure it’s properly seated into the channel and not on the threads
- Insert the new paper filter cartridge into the housing or snap it into the cap making sure that the round center gasket is properly seated
- Install the cap into the housing carefully to avoid cross-threading it
- Use a torque wrench to tighten to the torque specifications (usually listed on the cap/cover) – do NOT over tighten, especially with plastic covers
5. Reinstall the Drain Plug
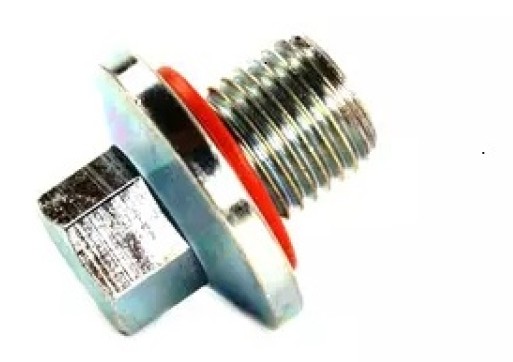
- Clean and inspect the drain plug
- Replace washer if recommended
- Replace the plug if the threads are damaged or stripped
- Apply clean oil to the threads and washer
- Thread by hand and tighten until the washer meets the oil pan to avoid cross-threading
- Tighten using a torque wrench – always torque to factory specs
- DO NOT OVER-TIGHTEN DRAIN PLUG: many pans are aluminum. Stripping is costly.
- Contact your dealer to find the torque specs for your engine’s drain plug
6. Add New Engine Oil
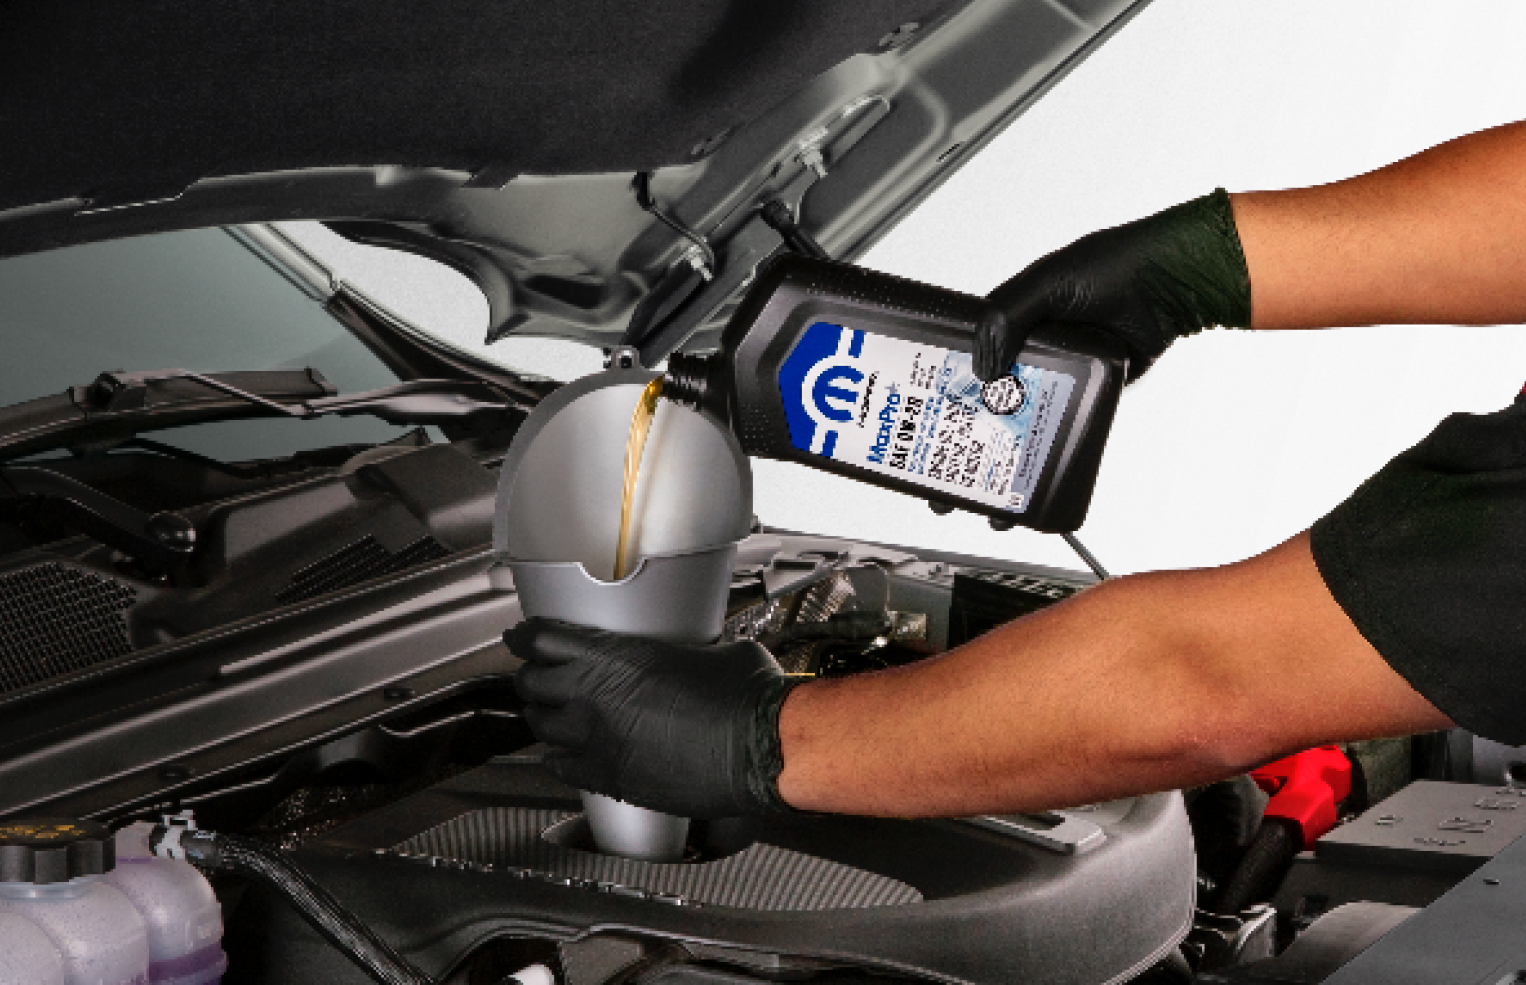
- Remove cap and insert a funnel into the oil fill opening
- Add approximately one quart less than full capacity
7. Circulate Oil and Recheck Level
- Start engine and idle for 30 – 60 seconds (do not rev the engine)
- Turn off and wait 5 – 15 minutes
- Remove dipstick, wipe it clean, reinsert it completely and remove it again
- Look at the markings on the bottom of the dipstick to check the oil level – there are four types of markings:
- Crosshatched zone
- Crosshatched zone marked SAFE
- Crosshatched zone marked with MIN at the low end of the range and MAX at the high end of the range
- Crosshatched zone marked with dimples at the MIN and the MAX ends of the range
- Add oil gradually until the level reaches the safe zone to avoid having to remove any.
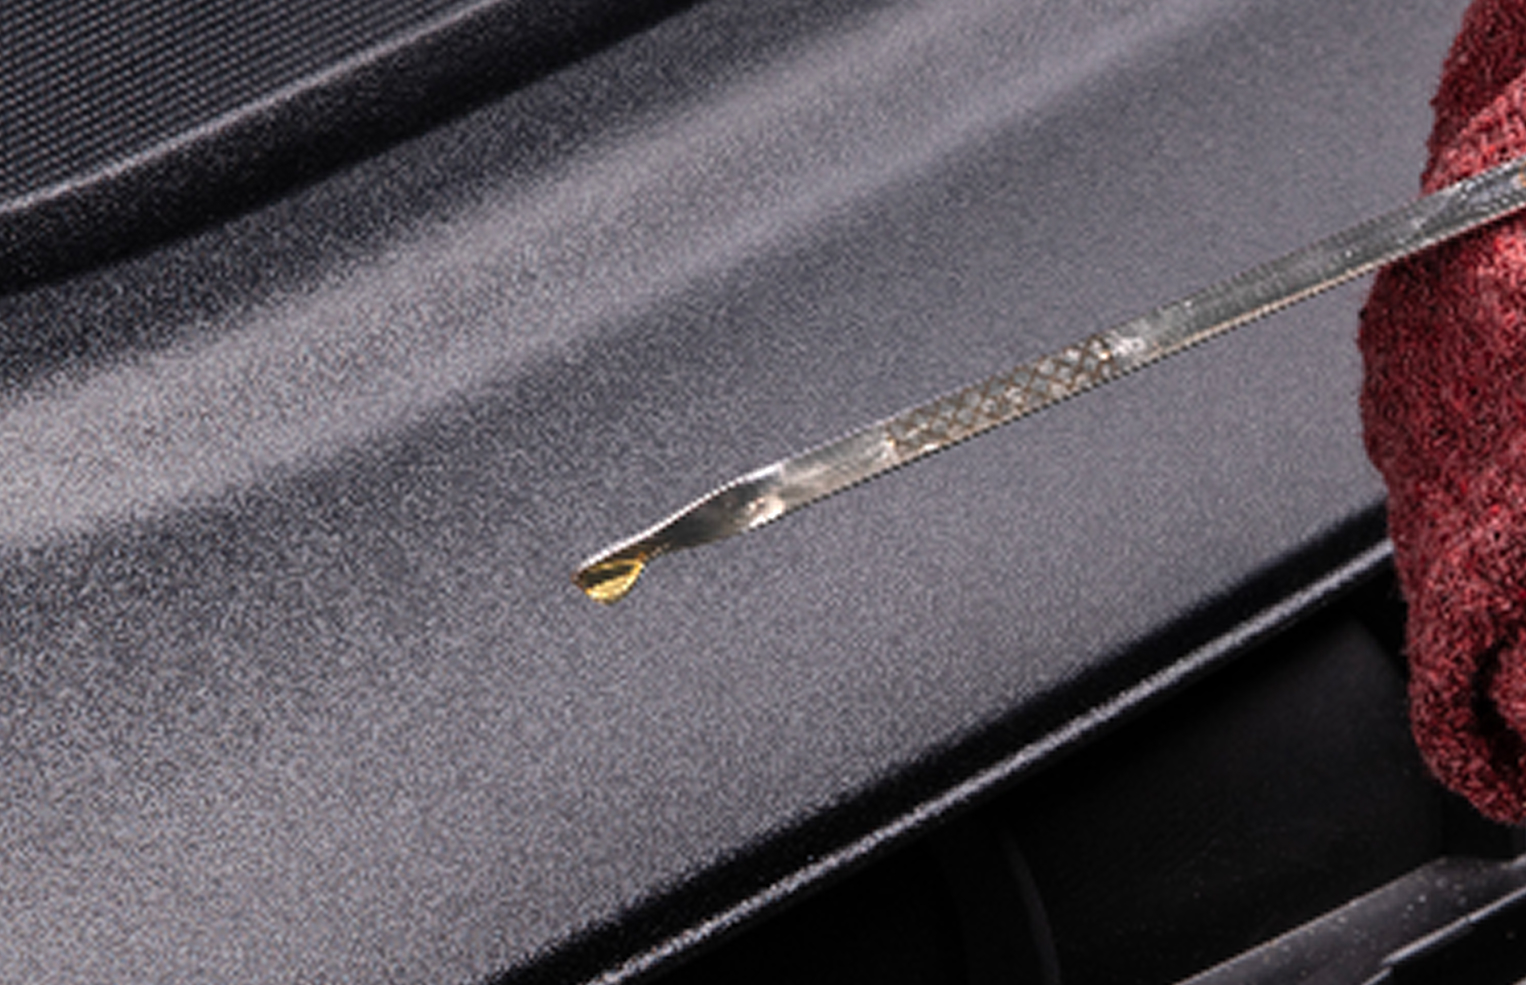
- Adding 1 qt (1.0 L) of oil when the reading is at the low end of the dipstick range will raise the oil level to the high end of the range marking
- Use care when filling engine oil to minimize spillage onto the top of the engine
- Any excess fluid that is spilled onto the top of the engine should be removed using compressed air or an absorbent cloth
8. Check for Leaks
- Inspect with a flashlight under and around the oil drain plug
- Wipe away any residual oil so that you can see fresh seepage
- If necessary, check it again with the torque wrench
- Inspect with a flashlight under and around the oil filter
- Wipe away any residual oil so that you can see fresh seepage
- If necessary, tighten by hand no more than a quarter turn (do not use tools to tighten)
- If either continues to leak, they may require professional service.
- Underbody Shield/Skid Plate
- If your vehicle has an underbody shield and/or skid plate which you removed to access the drain plug and oil filter, re-install these now
- For nuts and bolts: use a torque wrench to ensure that they are tightened to specifications
- For plastic push-pins: do not overtighten to avoid breaking or warping
- Remove the oil pan, tray, tools and/or blanket from under the vehicle
9. Lower the Vehicle
- Carefully reverse the lifting process:
- Jack up the rear, remove rear jack stands, lower the rear slowly with the jack
- Install chocks in front and behind the rear tires
- Jack up the front, remove front jack stands, lower the front slowly with the jack
- If using ramps
- Remove the rear chocks, start the vehicle, apply the brake, release the parking brake, shift into reverse and back off the ramps slowly
- If the vehicle wasn’t level while on the ramps or on jack stands, check your oil level again once level and add as necessary
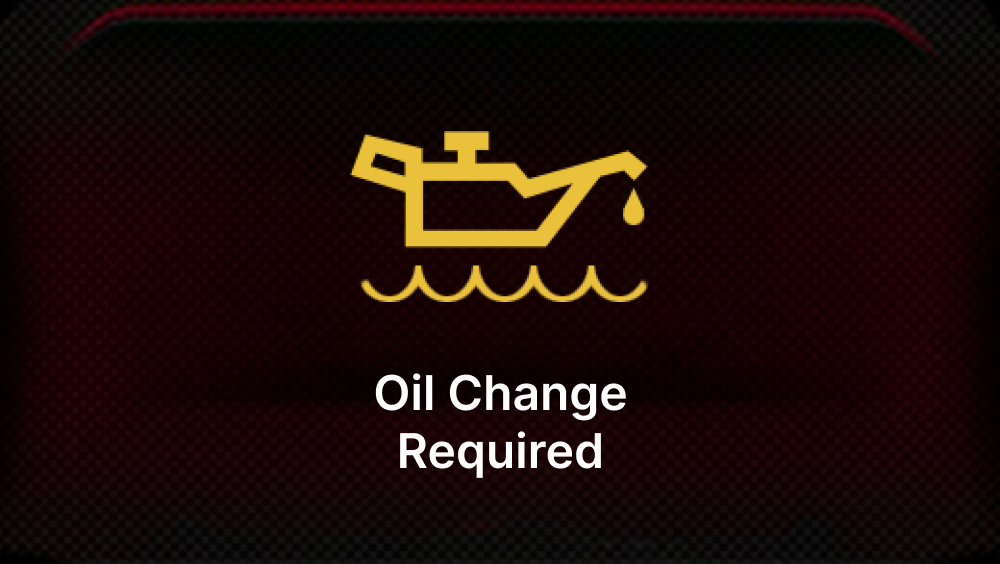
10. Reset the Oil Life Monitor
- For vehicles equipped with Keyless Enter ‘n Go™ Ignition, use the steering wheel instrument cluster display controls for the following procedure(s):
- Without pressing the brake pedal, push the ENGINE START/STOP button and place the ignition in the ON/RUN position (do not start the engine).
- Push and release the down arrow button to scroll downward through the main menu to “Vehicle Info”.
- Push and release the right arrow button to access the “Oil Life” screen.
- Push and hold the OK button to reset oil life.
- If conditions are met, the gauge and numeric display will update to show 100%.
- If conditions are not met, a pop-up message of “To reset oil life engine must be off with ignition in run” will be displayed (for five seconds), and the user will remain at the Oil Life screen.
- Push and release the up or down arrow button to exit the submenu screen. Always record mileage and date for maintenance tracking.

- Secondary Method of Resetting Engine Oil Life
- Without pressing the brake pedal, push the ENGINE START/STOP button and place the ignition to the ON/RUN position (do not start the engine).
- Fully press the accelerator pedal slowly, three times within 10 seconds.
- Without pushing the brake pedal, push the ENGINE START/STOP button once to return the ignition to the OFF position.
NOTES:
- Exact steps may vary by model/year – check your owner’s manual for exact instructions via the Mopar owner’s manual online.
- If the indicator message illuminates when you start the vehicle, the oil change indicator system did not reset. If necessary, repeat this procedure.
Recycling Used Engine Oil
Never dispose of used oil improperly. Transfer oil to a sealed container and recycle it at:
- Auto parts stores
- Dealerships
- Approved recycling centers
Used oil and filters are hazardous to the environment if discarded incorrectly.
Most Common Oil Change Mistakes
- Using the wrong oil type or viscosity
- Not replacing the oil filter
- Failing to remove the old gasket if stuck to the engine when removing the oil filter, often called “double-gasketing”
- Using the wrong filter
- Forgetting to lubricate the filter gasket
- Overfilling or underfilling engine oil
- Cross-threading or over-tightening the filter or drain plug
- Checking the oil level without circulating the new oil
- Revving the engine before oil circulates
- Forgetting to reset the oil life monitor and recording the mileage
Avoiding these mistakes protects your engine and prevents costly repairs.
Pro Tips for DIY Oil Changes
- Buy oil in larger containers to save money
- Keep extra oil filters on hand
- Add oil gradually – removing oil is harder than adding it
- Wear gloves and eye protection
- When removing the oil filter, unscrew it a couple turns and remove your hand to allow the excess oil to run down into the pan before removing it the rest of the way
- Check engine and cabin air filters during oil changes
- Engine air filters typically last 12,000 – 15,000 miles
- Cabin air filters last 15,000 – 20,000 miles
For more information on air and cabin air filters: How Often Should You Change Your Engine & Cabin Air Filter? | Mopar OEM Guide
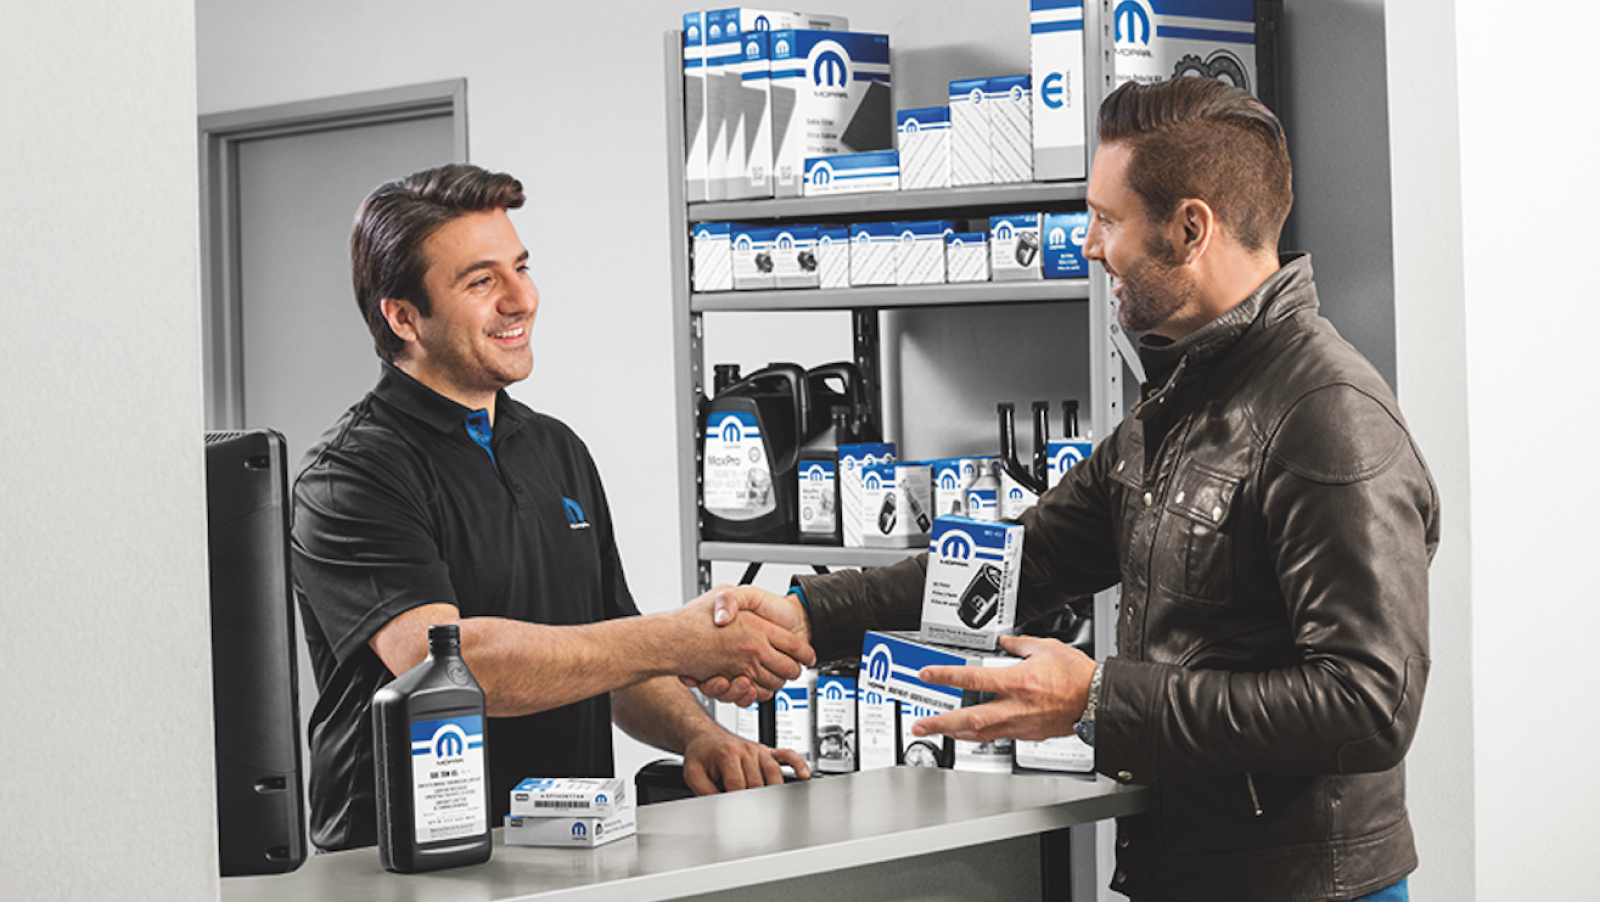
Prefer Professional Service? Try Mopar® Express Lane

If you’d rather have a pro handle it, your local Mopar® Express Lane at most Chrysler, Dodge, Jeep® and Ram dealers offers:
- No appointment needed oil changes and light maintenance
- A complimentary multi point inspection with each oil change
- Factory trained, certified technicians who know your vehicle
- Service for nearly all makes and models (we use Genuine Mopar parts for Chrysler, Dodge, Jeep®, Ram, Fiat and Alfa Romeo vehicles, and quality O.E.-backed bproauto® parts for others)
These are quick, quality services built around your schedule.
Tip: Many dealers also offer Express Check In—join the queue online, watch your wait time count down, and arrive when it’s your turn.
Mopar. At Your Service.
Warning: Working on a motor vehicle can be dangerous. Perform only services you are qualified for and have proper equipment to complete safely.